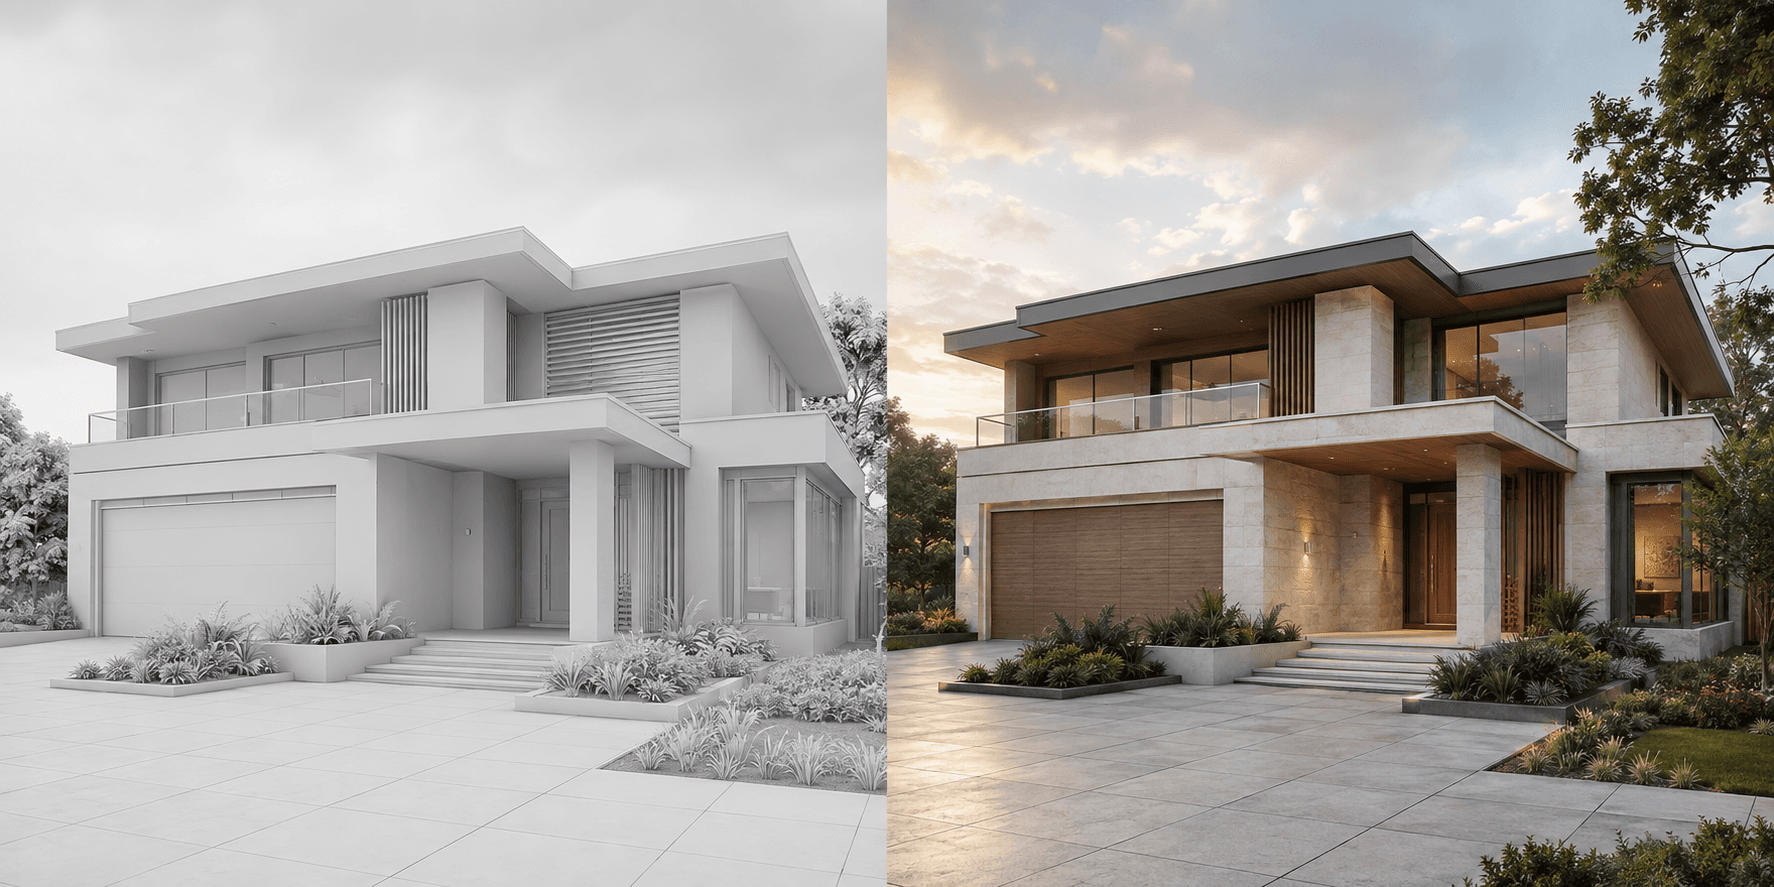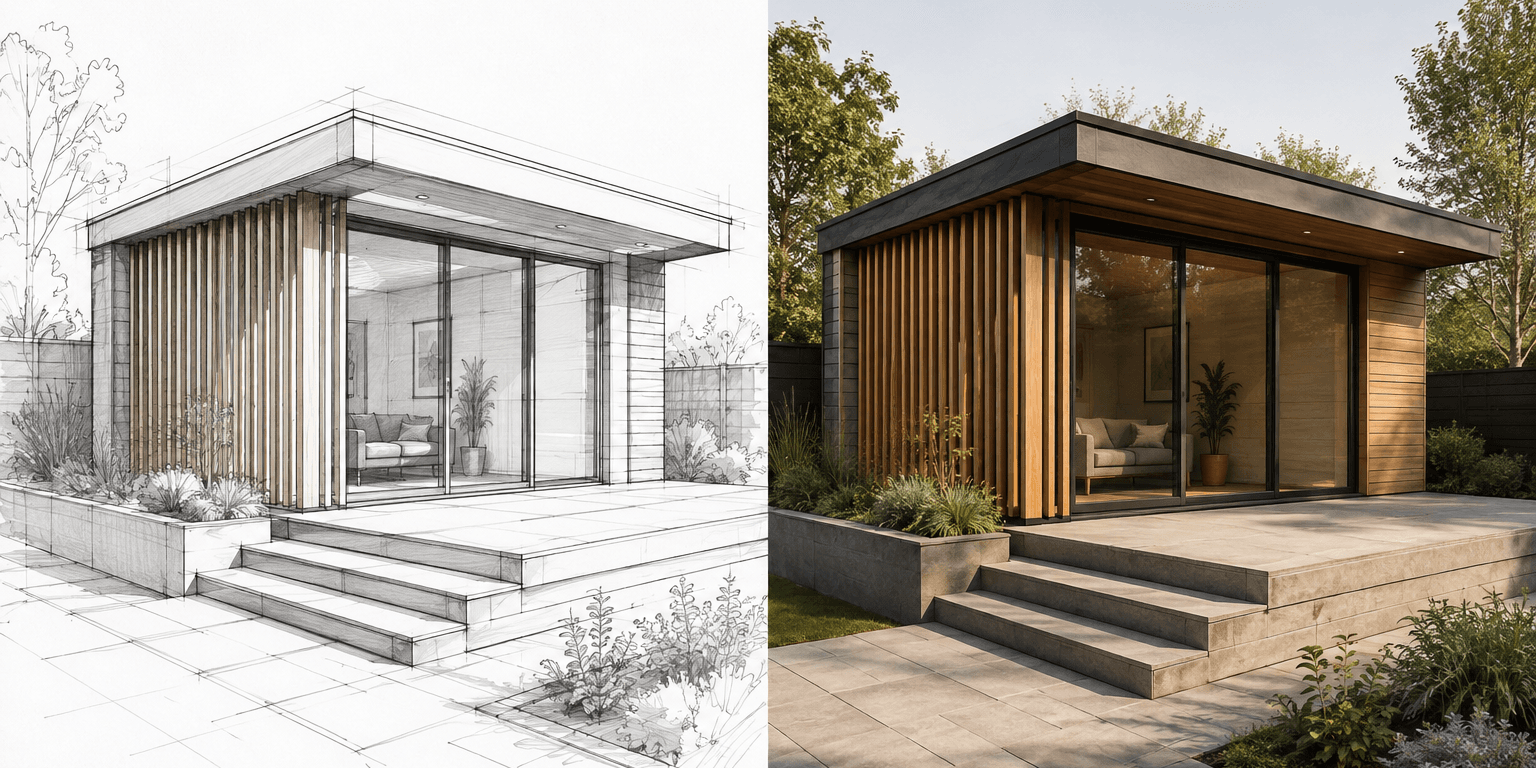
A sketch-to-render workflow gives an early architectural idea enough material, light and context for other people to understand it. It is most useful when the drawing already contains a readable design but the audience cannot yet imagine how that design might feel as a finished place.
What kind of sketch works best?
Choose a drawing that clearly separates the architecture from the page. Perspective sketches are natural sources for photorealistic camera views because they already communicate depth. Elevation-style concepts can also work when the façade rhythm and main volumes are unambiguous.
The sketch does not need to be polished. It does need confident edges, enough contrast and a crop that removes unrelated thumbnails or notes. If a line is accidental, erase it. If an opening matters, draw it clearly.
How should you prepare the image?
- Scan or photograph the page in even light.
- Correct the page perspective so the drawing is not skewed.
- Crop away empty paper and unrelated annotations.
- Increase contrast gently without losing lighter construction lines that explain depth.
- Save a separate clean copy and retain the original drawing.
How specific should the visual direction be?
Name the architectural character, two or three principal materials, the site context and the lighting. If the drawing leaves something unresolved, decide whether you want the visualization to interpret it or keep it neutral. A focused direction might specify pale brick, dark aluminium frames, meadow planting and overcast daylight.
Avoid attaching every inspiration image to one generation. Use separate visual directions when you want to compare genuinely different architectural moods.
How do you review an interpretation?
Place the render beside the sketch and follow the building from large to small: massing, roof, openings, structure, circulation cues, then materials and landscape. Decide which differences affect the idea and which are simply presentational detail.
If the visualization needs too many corrections, strengthen the source sketch or move the design into a simple model. The right input is the one that makes the non-negotiable information visible. Explore the full sketch to render page or compare it with the 3D model workflow.
Common questions
Can I use a photographed hand sketch?
Yes. Photograph it in even light, correct the page angle and crop the image so the architectural lines are clear.
Should construction lines be removed?
Remove distracting or accidental marks, but retain lighter lines that genuinely help explain perspective and form.
When should I use a model instead of a sketch?
Use a model when precise geometry, repeated openings or several coordinated camera views are more important than early concept speed.